https://woshub.com/how-to-clean-up-and-compress-winsxs-folder-in-windows-8/
How to Clean Up and Compress the WinSxS Folder on Windows
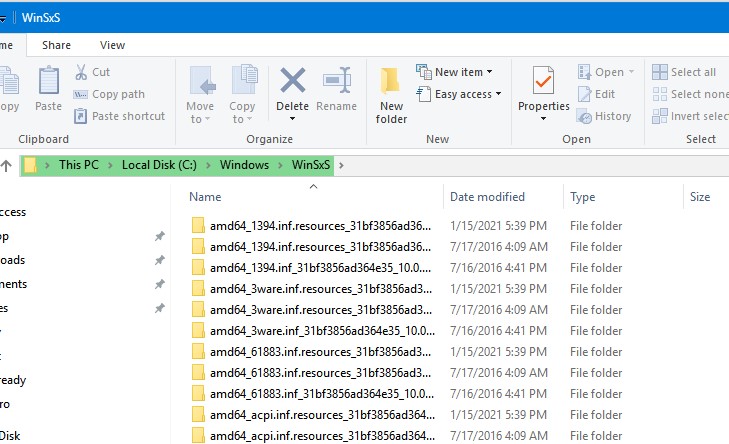
In this article we will talk about the WinSxS folder in Windows, the reasons for its constant growth, and ways to clean up it. The C:\Windows\WinSxS directory is the repository of Windows components. This directory contains DLLs, binary, and XML files necessary for the installation and operation of various Windows roles or features. When installing the Windows updates (usually this happens every month), the new version of the updated component is installed on the system, while the old one is saved to the WinSxS folder (it is necessary to provide compatibility and make it possible to rollback to the previous versions of the components when you uninstall the Windows update).
The WinSxS directory has grown in size over time. Moreover, its size is not limited by anything (although in practice the size of the WinSxS folder in Windows 10 rarely exceeds 15-20 GB).
Contents:
How to Check the Actual Size of WinSxS Folder on Windows 10?
How to Clean Up the Component Store (WinSxS folder) on Windows?
Remove Unused Roles and Features from Windows 10/Windows Server
In this article, we’ll go over the safest ways to clean up the WinSxS folder on Windows 10 and Windows Server 2016/2019:
Optimize the component store and remove old versions of Windows component files left after installing Windows updates;
Features on Demand – allows you to remove unused Windows components from the disk;
Enable NTFS compression on the WinSxS folder – a way to reduce the size of the WinSxS directory using the built-in compression of the NTFS file system.
Many users often ask: if it’s possible to manually delete files from the WinSxS folder. The answer is categorically NO! These actions can damage your Windows image. Though some attempts to remove files from the WinSxS folder can be successful, this method cannot be recommended.
How to Check the Actual Size of WinSxS Folder on Windows 10?
The easiest way to get the current size of the WinSxS folder on Windows is to open the properties of the %windir%\WinSxS folder in File Explorer (or use a PowerShell script). But keep in mind that most file managers (including File Explorer) show a slightly larger WinSxS folder size than it takes on disk.
The fact is that the WinSxS directory contains a large number of hard links (symbolic links) to system files in other folders. File managers, when calculating the size of the WinSxS folder, take into account the size of files referenced by hard links, but this is not correct.
You can find out the real size of the WinSxS folder on disk using the du tool from Sysinternals:du -v c:\windows\winSXS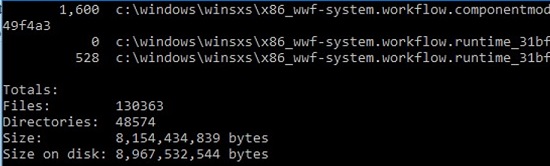
You can also analyze the size of the component store (WinSxS folder) using the DISM command:
Dism.exe /Online /Cleanup-Image /AnalyzeComponentStore
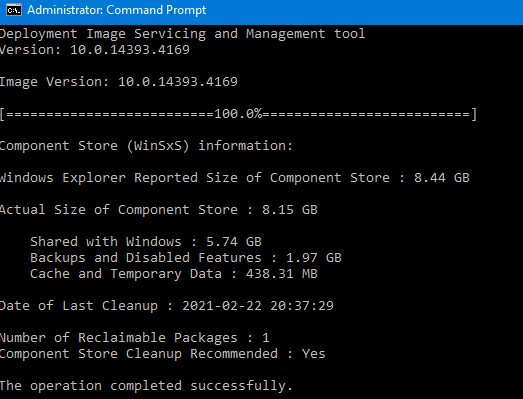
Deployment Image Servicing and Management tool [==========================100.0%==========================] Component Store (WinSxS) information: Windows Explorer Reported Size of Component Store : 8.44 GB Actual Size of Component Store : 8.15 GB Shared with Windows : 5. 74GB Backups and Disabled Features : 1.97 GB Cache and Temporary Data : 438.31 MB Date of Last Cleanup : 2021-02-22 20:37:29 Number of Reclaimable Packages : 1 Component Store Cleanup Recommended : Yes The operation completed successfully.
As you can see, in this case, I can reduce the size of the WinSxS folder by (1,97 + 0,44) Gb.
The DISM command also allows you to check and repair your Windows image:
DISM /Online /Cleanup-Image /RestoreHealth
How to Clean Up the Component Store (WinSxS folder) on Windows?
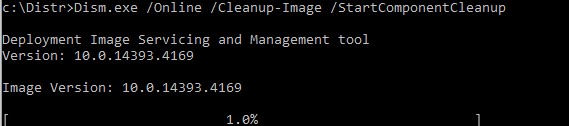
The fastest and easiest way to clear the Windows Component Store (the WinSxS folder) is to optimize the storage with the command:
Dism.exe /Online /Cleanup-Image /StartComponentCleanup
The StartComponentCleanup DISM option is supported on all Windows versions starting from Windows 8 and Windows Server 2012.
After cleaning is complete, check the current size of the component store:
Dism.exe /Online /Cleanup-Image /AnalyzeComponentStore
In my example, this reduced the size of the WinSxS folder by 2.4 GB.
The /StartComponentCleanup option has an additional /ResetBase option that allows you to remove all previous versions of components left after installing Windows updates. After that, you won’t be able to remove installed updates or Service Packs, and the Uninstall button will disappear from the Uninstall an Update Control Panel item). To clean up old versions of components, run:
Dism.exe /Online /Cleanup-Image /StartComponentCleanup /ResetBase
In Windows 7 and Windows Server 2008 R2, an additional DISM option was used to clean up old versions of components that were left over after installing service packs.
DISM /online /Cleanup-Image /spsuperseded
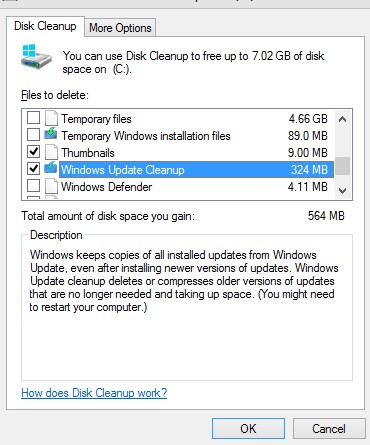
You can also remove old update files using the “Disk Cleanup” wizard:
Run the
cleanmgrcommand as an administrator;Select the disk and in the next window, click the “Clean up system files” button;
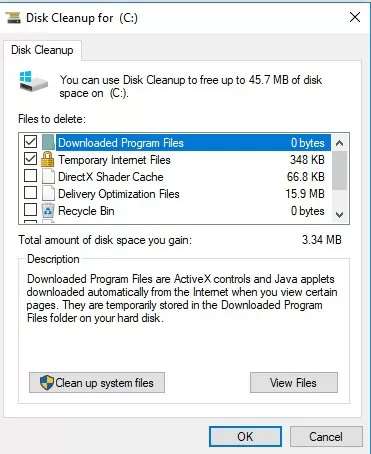
Then select the “Windows update cleanup” option. The Disk Cleanup tool will show how much space you can free up by deleting old Windows update files. In my example, this is 324 MB. Click OK to start the cleanup.


After you finish cleaning up the component store using DISM, check how much disk space has been freed.
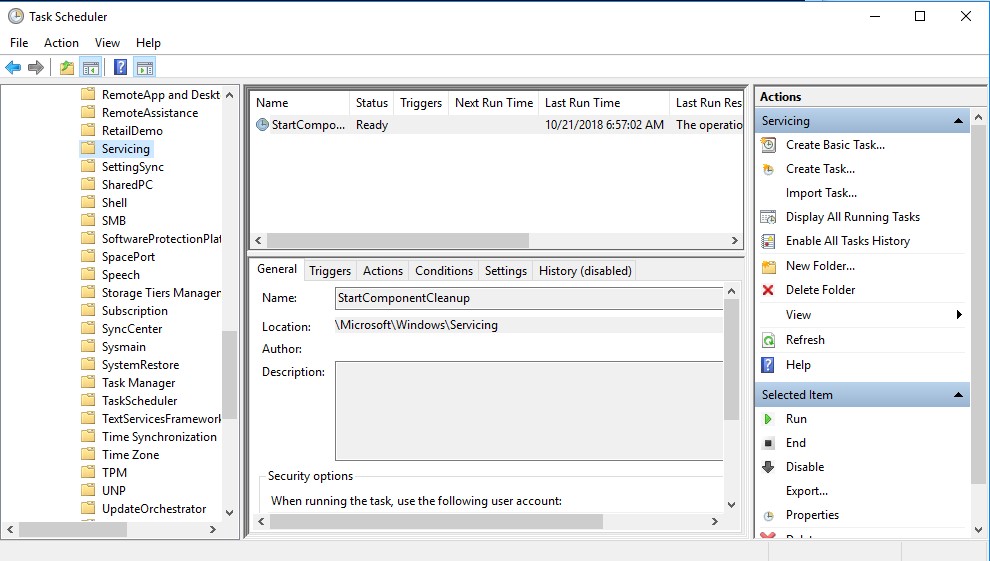
In addition, Windows 10/Windows Server 2016 Task Scheduler has a special automatic maintenance task that regularly optimizes and cleans up the WinSxS folder (same operation as DISM with StartComponentCleanup parameter). This StartComponentCleanup task is located under the \Microsoft\Windows\Servicing section of the taskschd.msc. This task runs in the background and automatically removes component versions older than 30 days that have been superseded by newer files.
You can start this task manually like this:
schtasks.exe /Run /TN "\Microsoft\Windows\Servicing\StartComponentCleanup"
Remove Unused Roles and Features from Windows 10/Windows Server
Features on Demand on Windows allows to remove binary files of the unused roles from the WinSxS folder. You can remove role and feature binaries on Windows Server using the Uninstall-WindowsFeature PowerShell cmdlet.
Windows 10 does not have the Uninstall-WindowsFeature cmdlet, and you must use DISM.exe to remove features from the Windows image.
Note that DISM, unlike the Uninstall-WindowsFeature PowerShell cmdlet doesn’t remove dependent features.
A complete list of available features in Windows 10 image can be obtained using the command:DISM.exe /Online /English /Get-Features /Format:Table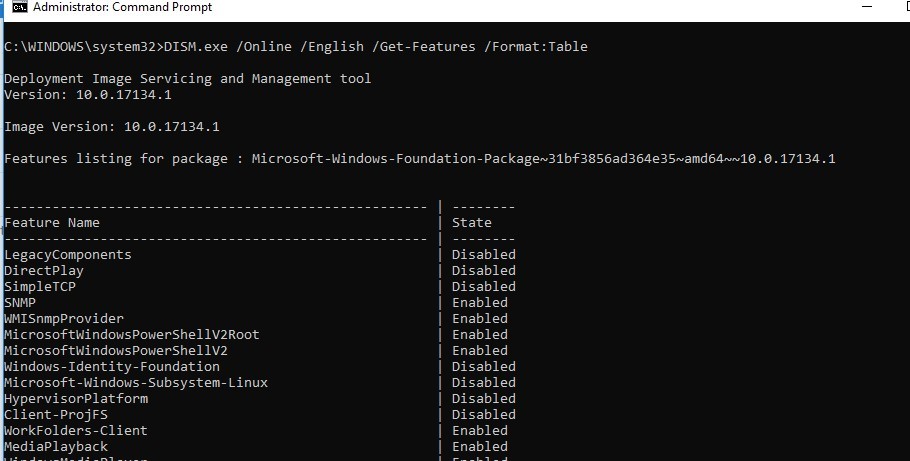
To remove, for example, the TelnetClient feature from the Windows image (from the WinSxS folder), run the command:DISM.exe /Online /Disable-Feature /Featurename:TelnetClient /Remove
If you display the list of all on-demand features available in Windows, you will see that the component status has changed to Disabled with Payload Removed.
Thus, Windows allows to significantly reduce the size of the WinSxS folder by removing the unused components from the disk. The only thing is that this cleanup method suits only advanced users, who are familiar with the Windows 10 features and their purpose.
How to Enable NTFS Compress on WinSxS Folder on Windows 10?
Another way to reduce the size of the WinSxS directory on Windows 10 is to compress the directory contents on the level of the NTFS file system.
Note. As in case of any non-standard intervention into the system configuration, you are strongly recommended to create a full backup of your Windows 10 image.
Open the command prompt as administrator;
Stop and disable Windows Installer and Windows Module Installer services:
sc stop msiserversc stop TrustedInstallersc config msiserver start= disabledsc config TrustedInstaller start= disabledLet’s backup the Access Control Lists (ACLs) assigned to the files and folders in the WinSxS directory using the built-in icacls tool. A backup copy of an ACL is a plain text file that lists all files and directories and the NTFS permissions assigned to them (later this file will be needed to restore the original ACLs):
icacls "%WINDIR%\WinSxS" /save "%WINDIR%\WinSxS_NTFS.acl" /t
Assign yourself as an owner of the WinSxS folder and all its subfolders:
takeown /f "%WINDIR%\WinSxS" /rGrant your account full control permissions on the WinSxS directory:
icacls "%WINDIR%\WinSxS" /grant "%USERDOMAIN%\%USERNAME%":(F) /tYou can now compress files in the WinSxS directory using the compact command. Because some of the files can be used by Windows, you need to specify the
/ioption. Otherwise, compression will stop at the first locked file (in Windows 10, you can use more advanced LZX compression):compact /s:"%WINDIR%\WinSxS" /c /a /i *
Restore the owner of the WinSxS directory back to TrustedInstaller:
icacls "%WINDIR%\WinSxS" /setowner "NT SERVICE\TrustedInstaller" /tRestore the original ACLs for the WinSxS folder items using the ACL backup file you created earlier:
icacls "%WINDIR%" /restore "%WINDIR%\WinSxS_NTFS.acl"Restore the default startup type for the Windows Installer and Windows Module Installer services:
sc config msiserver start= demandsc config TrustedInstaller start= demand


Now check the current size of the WinSxS folder:
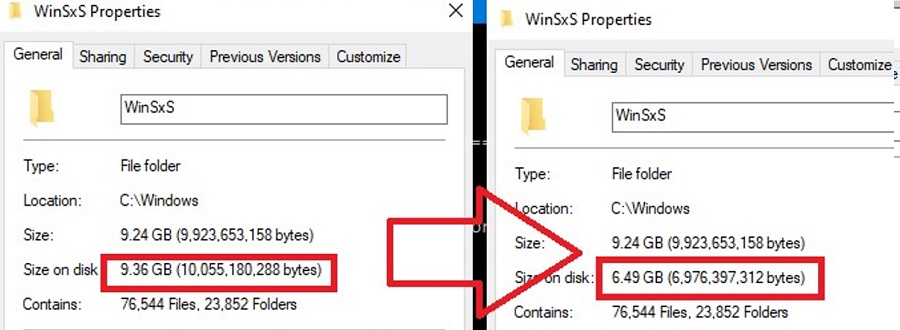
As you can see, in our example the size of the WinSxS folder after the compression has reduced from 9.4GB to 6.5GB (about a third). Not bad, especially for a small-sized SSD drive.
These commands can either be run separately (then it is much easier to track the results of each of them) or used in a single script file. If you run it, the described compression procedure for items in the WinSxS folder will start. You can download the ready-to-use batch file to enable NTFS compression on WinSxS here: winsxs_ntfs_compress.bat
You can use this script regularly because new uncompressed files will appear in the WinSxS folder after you install new Windows updates or apps.
What can be affected by compressing the WinSxS folder? Windows works transparently with compressed files. However, when processing such files, it may take additional CPU time to decompress/compress them. This may cause a slight slowdown when installing Windows components or updates. However, on modern CPUs, the file compression/ decompression operations are performed almost instantly, so the user may not even notice the real impact on performance.